Meta Ads / Facebook Ads
Important note:
We strongly recommend creating a new pixel rather than connecting your old pixel to Shoplytics. Otherwise, duplicate events and issues with the campaign algorithm may occur.
If you are sure that you want to use your old pixel, you can simply skip the first steps of this guide. But you can't go wrong with a second pixel.
Instructions:
- Log in to your Business Manager at business.facebook.com. (If you don't have a business account yet, you can create one on this page. Your ad account and pixel are just "assets" that sit within your business account.)
- On the left, click "All Tools" --> "Events Manager" and then click "Data Sources"
- Click the green "+ Connect Data" at the top left to create a new data source.
- Select "Web" as the type
- Enter the domain followed by "Shoplytics" as the name.
- In the next step, Facebook will offer you implementation instructions. You can ignore and close this.
- Click on Settings at the top right
- Copy the "Dataset ID"
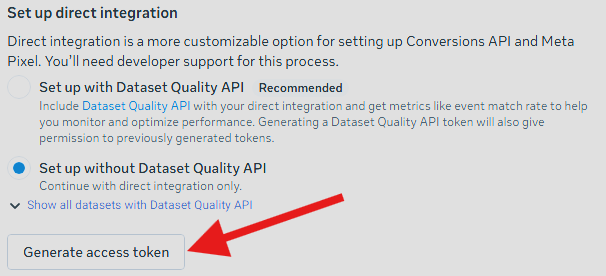
- Scroll down to "Set up direct integration" and generate an access token without "Dataset Quality API"

- Send these two pieces of information to data@shoplytics.io so we can activate the integration.
- In the pixel settings, also click "Share with ad account" so that the audiences work.
Enabling error monitoring:
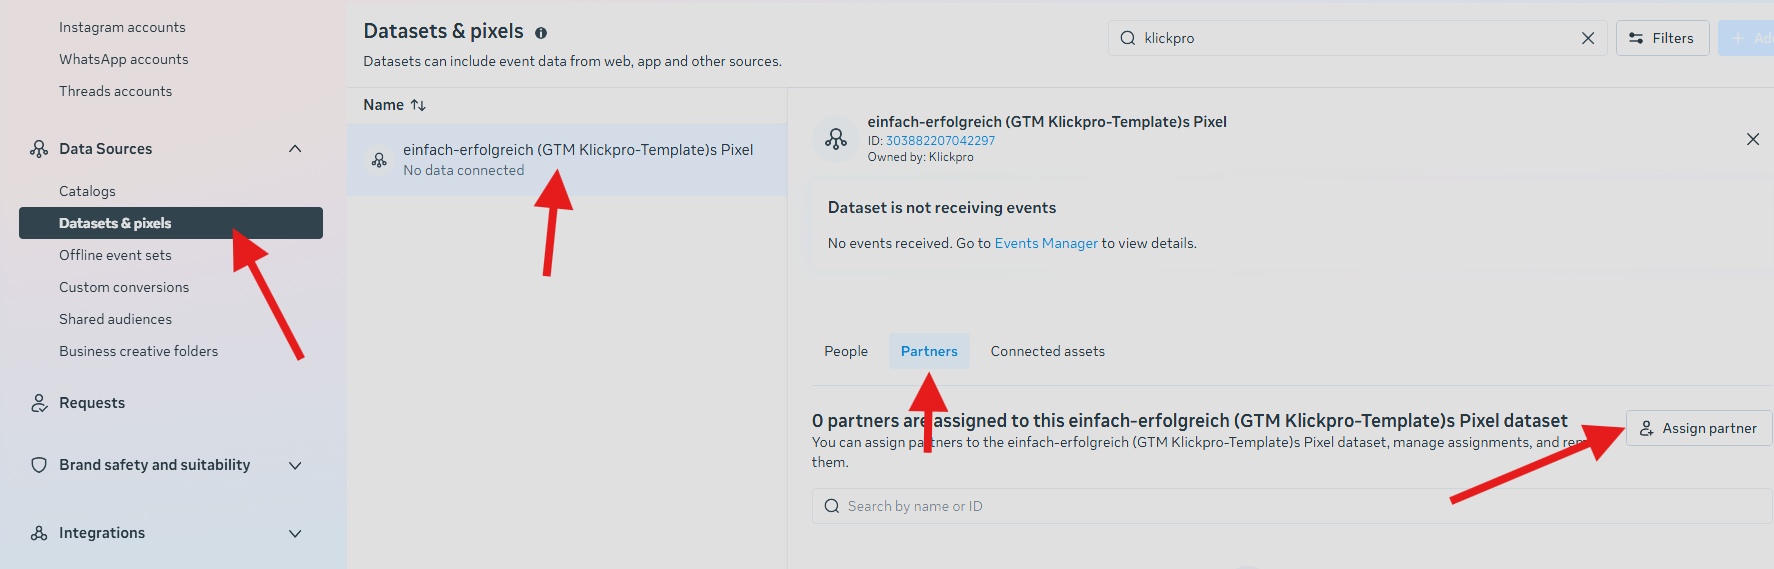
So that we can check whether the pixel is being supplied with data correctly, you should definitely also grant the Shoplytics team access to the pixel and the ad account.
To do this, simply go to Business Settings --> Datasets --> Assign Partners --> grant access to business ID 1800068976920756.